

For years I used Evernote to capture my ideas. But the cost got way too high $250/year! Wow.
I moved all my Evernote notes to markdown format (a tutorial that I need to write). I keep control of my files, not some other company. And markdown is free. Markdown is a plain text format that is readable. It’s not some complicated format that will be unusable years from now.
Every day I create a new note to capture my ideas. I keep all these notes in a program called Obsidian (also free). It gives me an easy way to search through all my notes.
I’ve been using markdown for my daily notes since 2021. It’s a system that works for me. I sync my notes via Dropbox, so they’re available on multiple computers.
However, I never bothered with images. I don’t want to use up storage on Dropbox because it has a cap on how much storage I can use.
My notes are all text. If there is a note referring to an image, I just put the filename in there. If I need to reference the file, I would search my hard drive for it. Honestly, that rarely happens.
But it would be nice to have the images show in the notes. Obsidian’s default way of handling this… if you drag an image into your note, it includes the reference to the image in the note. It saves a copy of the image to your main Obsidian folder (called a vault). That is not going to work for me, because I don’t want a ton of images building up in my Dropbox.
I need my images to be OUTSIDE my Obsidian vault. But that image needs to appear in the note.
I came up with a solution. Anytime I put an image in a dedicated folder, it automatically copies the image’s path. I got into my markdown note, and paste in the path. Boom. The image appears!
It involves a bit of AppleScript, so this will work only on Macs.
The Setup Steps
1. Create the folder
Set a dedicated folder on your computer that is OUTSIDE your Vault. (Remember, we don’t want this to be in a Dropbox folder).
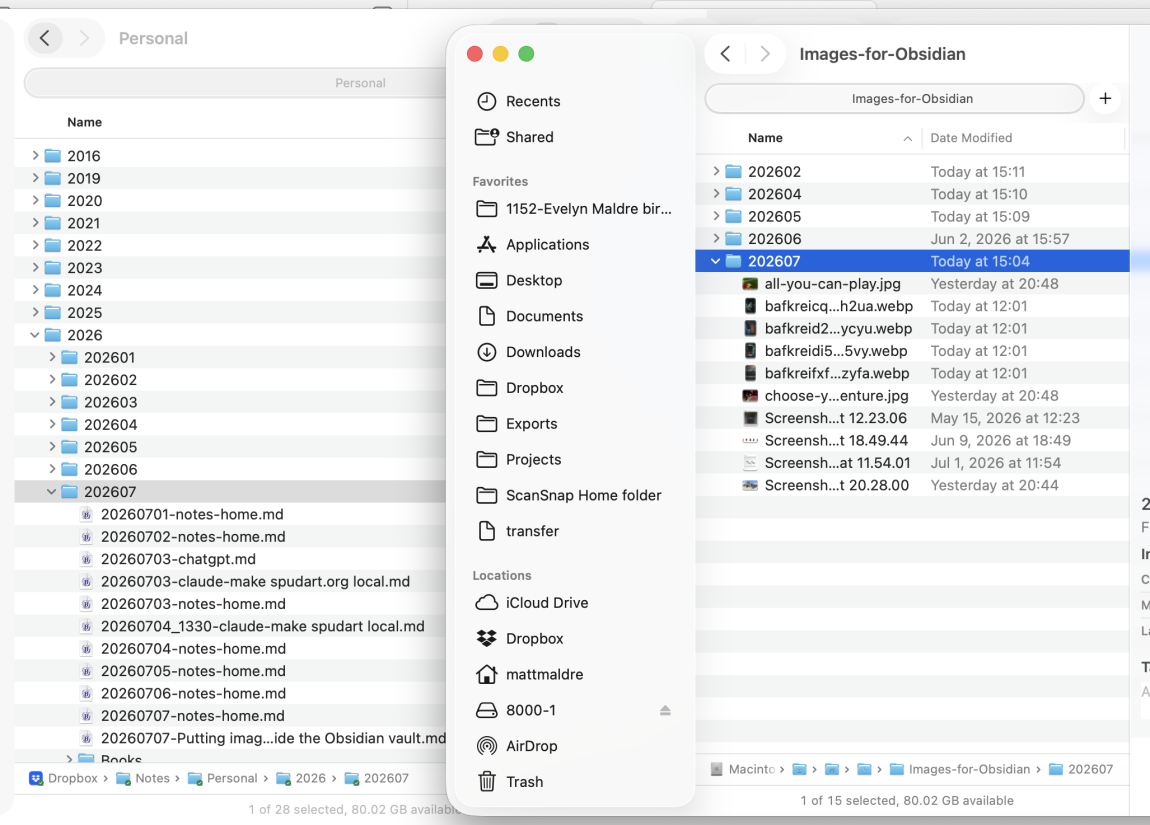
I keep my folder at: /Users/myusername/Documents/Images-for-Obsidian/202607
To make things manageable, I have a folder for every month. That way, I don’t have a bajillion images in one folder. And over time, if I need to transition the folder off my local hard drive, I can take all the months from one year, and do the work.
2. Create the Script
- Open the Script Editor app on your Mac.
- Paste the following AppleScript into the window:
AppleScript
on adding folder items to this_folder after receiving added_items
set finalString to ""
repeat with anItem in added_items
-- Get the POSIX path of the file
set thePath to POSIX path of anItem
-- Replace spaces with %20
set {TID, text item delimiters} to {text item delimiters, " "}
set pathList to text items of thePath
set text item delimiters to "%20"
set encodedPath to pathList as string
set text item delimiters to TID
-- Build the Markdown string
set theMarkdownLink to ""
-- Append to finalString with a newline if it's not the first item
if finalString is "" then
set finalString to theMarkdownLink
else
set finalString to finalString & linefeed & theMarkdownLink
end if
end repeat
-- Copy to clipboard
set the clipboard to finalString
-- Confirmation
display notification "Path(s) copied to clipboard!" with title "Folder Action Complete"
end adding folder items to
- Go to File > Save.
- Crucial: Save it in the folder:
~/Library/Scripts/Folder Action Scripts/. Name it something like “CopyPathToClipboard.scpt”.- Tip: If you don’t see the Library folder in your home directory, hold the
Optionkey while clicking the “Go” menu in Finder; “Library” will appear.
- Tip: If you don’t see the Library folder in your home directory, hold the
3. Attach the Action to Your Folder
- In Finder, right-click the folder you want to watch (e.g., your “External Assets” folder).
- Select Services > Folder Actions Setup…
- Ensure Enable Folder Actions is checked at the top.
- In the list on the left, find your folder. If it’s not there, click the
+button to add it. - With the folder selected, click the
+button in the “Script” column on the right. - Select the CopyPathToClipboard.scpt you just saved and click Attach.
How to use this workflow
- Drop an image file into that specific watched folder.
- Wait a split second. The script will fire automatically in the background.
- Go to your Obsidian note and press
Cmd + V. The formatted Markdown link is already waiting on your clipboard.
Important Caveats
- Multiple files at a time: This script is designed to handle multiple images. Since you are dropping files into a folder, the script will trigger immediately upon the file being moved into that folder. If you move 10 photos at once, the
finalStringvariable will accumulate all 10 links, and once the loop completes, it will push the entire block of text to your clipboard at once. - The “Drop” Delay: If you are moving a very large volume of files (e.g., 100+), the script may take a few seconds to process. You will know it is finished once you see the notification.
- Overwriting: Remember that every time you drop files into this folder, it will overwrite whatever was previously on your clipboard. If you need to append to an existing list in your note, paste the previous result first before dropping the next set of files.
- Testing: Try dropping just two images first to ensure the line breaks (
linefeed) appear exactly how you want them in your Obsidian note.
By using this, you achieve a fully “passive” workflow: you simply drop the image(s) into the folder, and the Markdown text is instantly ready to be pasted into your note.